Saved views in ScanPay help you quickly filter and organize jobs based on specific criteria—such as job status, schedule, or team assignment. Whether you're looking to track unscheduled work, view only active jobs, or focus on what’s due today, saved views allow dispatchers and admins to stay organized and take action faster.
Saved views are especially useful for dispatch teams managing dozens of jobs across different cities, services, or crews. With just one click, you can access the exact set of jobs you need to focus on—without resetting filters every time.
What Are Saved Views?
A saved view is a custom job list filtered by parameters like:
- Job status (e.g., In Progress, Done Pending Approval)
- Schedule date
- Assigned team
- Tags, external companies, or lead sources
There are default filtered views (e.g., Today’s jobs, Active Jobs, Unscheduled jobs), but you can also create saved views with your own filters.

Creating a New Saved View
To create a new saved view:
- Go to the Jobs or Map
- Click + Add view, then click Create new view
- Enter a name for the view (e.g., "John’s Upcoming Jobs") and click Save.
- Apply filters you need—for example, filter by status = “Confirmed” and technician = “John Doe”.
- Once the filter is applied, click Save View in the top right corner.
The view will now appear in your saved list for one-click access.
Managing Your Views
You can rename, duplicate, or delete any custom view by clicking the three-dot menu next to it. Default views cannot be edited but serve as templates for creating your own.
- Click the tab of the view you want to edit. If it doesn’t appear as a tab, click + Add view, then select the view.
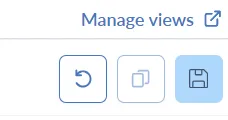
- To edit a view’s filters, adjust the filters, and click the Save icon.
- To edit a view’s sort order, click the column header you want to sort by. Then save the order by click the Save icon
- To duplicate a view, click the Copy icon.
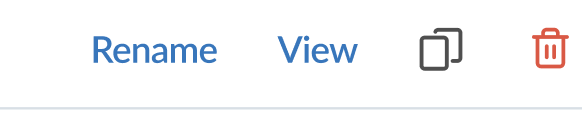
- To delete a view, click Manage views. Click on the delete icon next to the view you want to delete. The view will be deleted but the jobs included in the view will not be deleted.
Configure view tabs
You can set which views are shown as tabs on your Jobs or Map page and set the order of the views which will open when come to the page.
To decide which views are open as tabs and order of the tabs:
- To open an existing saved view, click + Add view to the right of your tabs, then select a view from the dropdown menu. Once opened, tabs automatically remain pinned on the index page unless you close them. You can also view all available views, including both default and custom, by clicking All views.
- To reorder your views, click and drag a tab to a new position.
- To hide a view, click the X on the view's tab. You can reopen the view from the + Add view dropdown menu or the All views page.